PrimeLMS Doc
Product LinkInstallation PlansSupport
  • Introduction
  • Changelogs
  • Getting Started
  • 🚀Admin Setup
    • 1. Flutter Installation
    • 2. Code Setup
    • 3. Firebase Setup
      • 3.1 Firestore Database Setup
      • 3.2 Database Security Rules
      • 3.3 Database Index Setup
      • 3.4 Push Notification Setup
      • 3.5 Firebase Storage Setup
    • 4. App Configs
    • 5. Upload to Firebase Hosting
    • 6. Admin Credentials Steup
    • 7. Conclusion
  • 📱App Setup
    • 1. Introduction
    • 2. Code Setup
    • 3. Firebase Setup for Android
      • 3.1 Android Package Name Setup on Firebase
      • 3.2 Change Package Name Android
      • 3.3 Generate Debug Certificate
      • 3.4 Generate Release Certificate
      • 3.5 Google Sign In Setup for Android
      • 3.6 Facebook Login Setup for Android
      • 3.7 Additional Firebase Setup for Android
    • 4. Firebase Setup for iOS
      • 4.1 iOS Package Name Setup on Firebase
      • 4.2 Change Package Name iOS
      • 4.3 Facebook Login Setup for iOS
      • 4.4 Apple Login Setup
      • 4.5 Additional Firebase Setup for iOS
    • 5. Push Notification Setup
      • 5.1 Android Notification Setup
      • 5.2 iOS Notification Setup
    • 6. Multi-Language Setup
    • 7. Ads Setup
      • 7.1 Admob Setup for Android
      • 7.2 Admob Setup for iOS
    • 8. App Information Setup
      • 8.1 Change App Name
      • 8.2 Change App Icons & Images
    • 14. Run The App
    • 15. Releasing the Android App
    • 16. Releasing the iOS App
  • ⚒️In-App Purchase Setup
    • 17. Subscriptions Setup
      • 17.1 Android Setup
      • 17.2 iOS Setup
      • 17.3 Code Setup for Subscriptions
  • ⚒️Customization
    • 18. Enable/Disable Specific Features
Powered by GitBook
On this page
  1. Admin Setup

3. Firebase Setup

Previous2. Code SetupNext3.1 Firestore Database Setup

Last updated 1 year ago

We have used the Firestore Database from Google as the backend for this project.

  • First, Go to the and sign in with your email account, and go to the console.

  • Create a project by your app name. And go to the project overview.
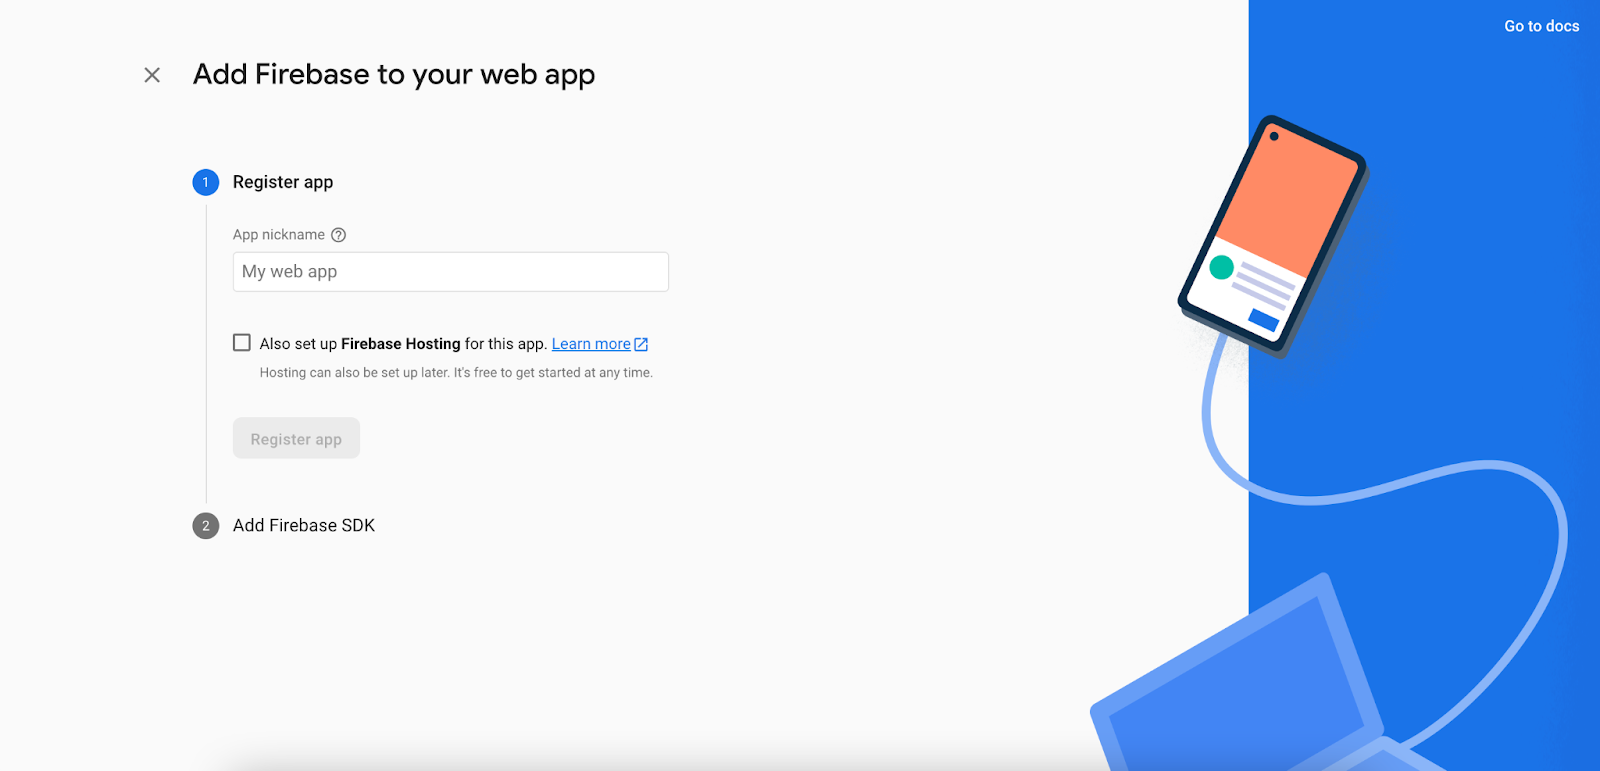
  • Click on the plus icon and then click on the web icon. You will see a popup like the second picture below:

  • Input the name as Admin Panel and fill in the checkbox because you need hosting too and then click on register app. After that, Skip the other options by clicking next. (Don’t input a custom name for hosting else you need extra setup for this which is not recommended)

  • Now go to Project Settings. At the bottom, Select the Admin Panel and copy the selected lines shown in the picture below:

  • Now, go to your IDE and open the lib/firebase_option.dart file and paste the line there.

That's it.

🚀
Firebase Console